HTML Images
In this lesson you are going to learn how to display images on your web page. For this we use the img tag, specifying the source of the file:
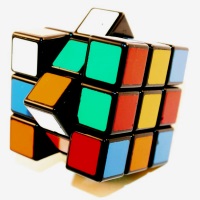
<img src="rubiks-cube.jpg" />
This is a singleton tag so there's no separate opening and closing tag.
We have learned about relative and absolute links. We can specify the path (URL) to our image file both ways.
Height & Width
Web browsers download and render the HTML code first and after that the images. This means that the browser doesn't know the size of the images the moment when it displays the page. It will add them to the page later, oce it finished downloading the image file but you can reserve the desired spot on the page to make the loading look smotther.
To reserve the area for the images you need to include the height and the width attributes in pixels. To find the height and width of an image, you can download any free image editor like IrfanView or Paint Dot Net. Once you download and install any of these programs you can find the image properties, in our case 200x200 pixels.
Now all you need to do is plug it into your image tag.
<img src="rubiks-cube.jpg" width="200" height="200" />
The alt Attribute
It's useful and recommended by Google to add an alt attribute to your images. This is a short description for people with disabilities that use computers since they can't see images while surfing the internet, it tells them what the image looks like. All you need to do is put the short description.Keep the description under 5 or 6 words.
<img src="rubiks-cube.jpg" width="200" height="200" alt="scrambled Rubik's Cube" />
Align The HTML Images
You can also use the style attributes to set the images aside. See how to float an image with with a little margin that creates a gap between the image and the text.
<img src="rubiks-cube.jpg" width="200" height="200" alt="Rubik's Cube" style="float: right; margin: 0 0 10px 20px;" />
Optimizing Page Loading Speed - Resizing Images
 Being a Webmaster we have to keep our pages fast loading. We can't have people sit there for a minute or two waiting for graphics to load, otherwise they will just leave your site. You have to keep the size of your graphics down to a minimum and there are several ways to do that. Before I explain them, I have to ask you to download Paint Dot Net (if you haven't already) because we are going to use that program to edit an image. You can use other programs like Paint Shop Pro or Adobe Photoshop, but they are expensive and for right now you really don't have to do any big time editing.
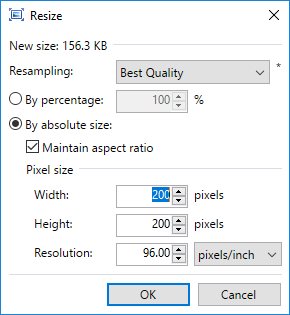
Use the Ctrl + R keyboard command or select Image / Resize in the file menu. Select the desired size and finally save the file. Try to avoid files larger than 50 kb. Use Webpage Speed Tester to spot large images on a webpage.
Image Extensions
The most common image extension, supported by all popular browsers are jpg, png and gif. Use .svg files for vector-graphic images.
jpg, png, gif
- jpg - Good compression but quality loss, use this as default format.
- png - Larger files and it supports transparency.
- gif - Fewer colors and you can animate the images.
jpg:  png:
png:  gif:
gif: 
Linking Images
We learned about links in the previous chapter, now it's time to learn how to make a clickable image link:
<a href="https://ruwix.com/" target="_blank">
  <img src="/html/tutorial/img/rubiks-cube.jpg" width="200" height="200" alt="Rubik's Cube" />
</a>
This clickable image renders like this on the website: